

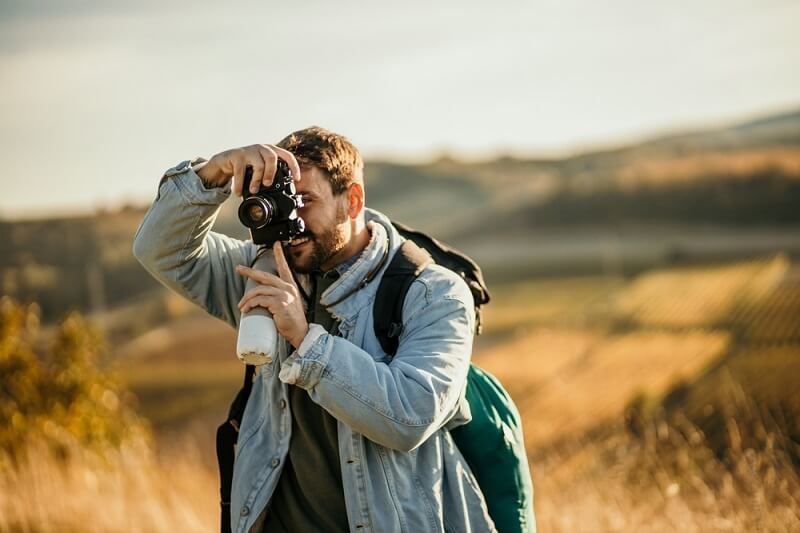
Landscape photography involves much more than picking up your camera and photographing a stunning landscape. Landscape photography is truly about light, composition, and emotions, all of which translate into storytelling. This storytelling can involve mountains, water, or a well-thought-out landscape gear setup. Mastering the craft of landscape photography requires patience, creativity, and techniques. Landscape photography can involve chasing the moment of sunrise or experimenting with filters to achieve different styles of landscape photography. All of these decisions are part of converting a moment in nature, captured from our camera, into an extraordinary photo.
This in-depth guide takes you deep into all that you should know about landscape photography—from camera equipment and lighting to composition and post-processing—so you can bring your outdoor photography to a professional level.
Fundamentally, landscape photography is all about capturing the essence and grandeur of nature. It's an aesthetic pursuit that requires technical expertise blended with an understanding of the details of nature—light, texture, and motion.
The best landscape imagery is emotionally moving. It prods us to feel the bite of mountain air after climbing, or the amusing silence of a still lake at the break of dawn. But this isn't an accident. It takes planning, being aware of the surroundings, and skillful manipulation of light.
Perfect landscape photography captures more than an image - it captures an experience - a barely recognizable blip of light and land that only lasts for a moment in time.
An effective landscape equipment kit setup is all this a photo shoot is about!
You don't have to spend a fortune on the costliest equipment, but knowing what equipment assists in delivering your creative vision is essential.
For landscapes, full-frame cameras tend to offer better dynamic range and detail, but new mirrorless and APS-C cameras are also great options.
Wide-angle lenses (14mm–35mm) are needed to take in the big views, while telephoto lenses (70mm–200mm) isolate far-away items such as mountain ridges or waterfalls.
A good tripod is not optional. It holds your camera steady during extended exposures—particularly in low light or windy situations—guaranteeing tack-sharp images.
Utilizing filters on landscapes is an advanced but necessary skill. Neutral density (ND) filters cut light into your lens, enabling longer exposures for silky water or ethereal skies. Polarizing filters increase contrast, eliminate reflections, and make blue skies richer.
Buy a waterproof camera pack, rain cover, and microfiber cloth. Mother Nature can be unpredictable, and your landscape equipment setup needs to be prepared for unexpected weather changes.
Good composition in landscapes can be the difference between taking a generic shot and creating a masterpiece. Imagine your frame as a canvas—where each line, texture, and color directs the viewer's eye.
Split your frame into nine equal sections and position your key elements (such as a horizon or tree) along the lines or intersections. It will naturally create balance and interest.
Roads, rivers, or shadows may be used to lead the viewer's eyes into the picture, directing them to your subject. Employ these lines purposefully in order to establish depth and direction.
Excellent landscape photography stacks its elements. Include some compelling foreground elements, like rocks or flowers, to add scale and dimension to your images. This step will make your scene more interesting.
Don't fill your image too full. Negative space gives your subject some room to breathe and adds expansiveness to your landscape.
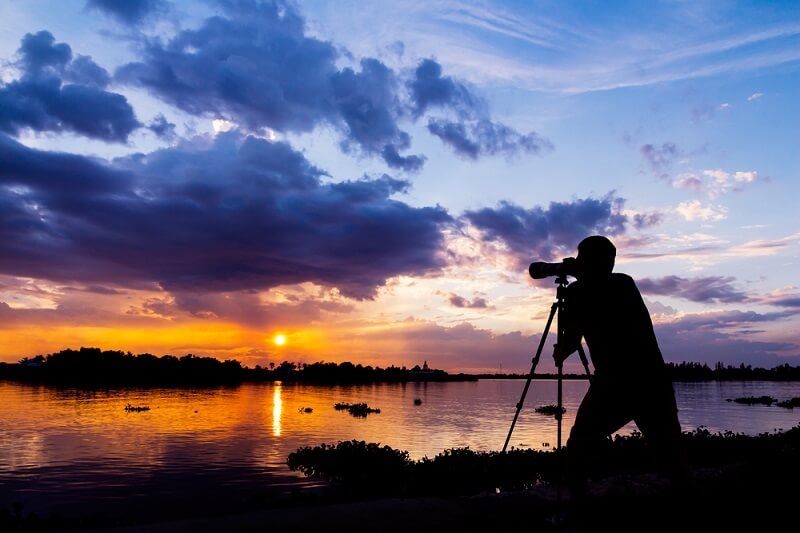
Dramatic peaks or serene lakes are some of the most compelling landscapes to photograph. Taking photos of mountains and water requires an understanding of light and timing.
Mountains are at their finest during the "golden hours," which are the moments just before or after sunrise and sunset. Use side lighting to highlight ridges and textures. If the sky is grey (cloudy), then just focus the image on shapes and patterns instead of color.
Water offers numerous possibilities for creating, utilizing long exposure to make flowing water appear like lacy ribbons. Or capture splashes and movement with a fast shutter speed. ND filters help you achieve the right amount of motion blur without excessive movement in stationary objects (such as rocks or trees) while photographing the water.
Lakes and rivers can hold the images of what is around them. A polarizing filter can help you soften the amount of reflection, and you can experiment with all angles to find good symmetry.
Few photography experiences rival the beauty of sunrise landscape photography. Dawn light is soft, warm, and magical—it can transform a mundane scene into pure magic.
Arrive at your location a day early. Use apps like PhotoPills or The Photographer's Ephemeris to show you where the sun will rise, when it will rise, and the general direction of sunrise.
Plan to be in position at least 30 minutes before sunrise. The light before sunrise often has the brightest color.
Start at ISO 100 and an aperture of f/8 to f/11, and adjust shutter speed as needed based on light. Bracket for sharpness with the tripod, and consider merging a few exposures.
Place the sun behind, or partially behind, a subject to grab starbursts or silhouettes to create visual drama. These techniques make sunrise landscapes intriguing to the viewer.
Filters are not an accessory; they are tools that assist you in controlling light and mood. Using filters with landscapes can alter the appearance and feel of your images.
They cut glare from shiny surfaces such as water or foliage, intensify blue skies, and add contrast. They're worth their weight in gold when photographing mountains and lakes.
ND filters are crucial for managing exposure time. They enable you to decrease your shutter speed without over-exposing your image—perfect for silky water or smooth clouds effects.
These level out the difference in exposure between a bright sky and a dark foreground—typical in sunrise or sunset shots.
Although UV filters generally serve the purpose of protecting your lenses, they also help cut down a little bit of haze to improve clarity in distant subjects.
Even the best photo will need some editing! Post-processing can really create a clearer version of the image in your mind that you had when shooting.
You should shoot everything in RAW. It will capture as much detail as possible in the original scene and will give you more wiggle room when editing.
Edit to correct any issues with exposure, contrast, and white-balance to get the photo back to a more natural depiction of the scene. Don't overdo it and keep it realistic!
Use selective sharpening and remove noise in the shadows to keep it sharp without losing texture.
Crop slightly to enhance framing or tighten composition in landscapes as needed.
The most interesting landscape photography is not about being perfect technically—it's about a vision. Learn knowledge from the masters like Ansel Adams or Galen Rowell, but have your own vision! Experiment with various angles, color harmonies, and compositions that reflect your unique perspective on nature.
You should ask yourself: what feeling do I want my audience to feel? That thought will guide every technical and aesthetic decision.
The journey to mastering landscape photography is not easy; it is a time-consuming and patient endeavor. Practicing your landscape gear setup and experimenting with photographing mountains and water will add complexity to your photographs, incorporating all the things you know. Once you integrate intelligent composition into landscapes, begin landscape photography at first light, and experiment with landscape filters, you will notice your photographs developing into a chronicled visual story, rather than surface-level images.
Each sunrise, every storm, and each mountain peak provides another opportunity. The more you see, the more relationships with that experience you will develop in yourself and in your creativity.
This content was created by AI