

Golden hour has a funny way of slowing everything down. The light softens, shadows stretch, and suddenly, even a simple backyard looks cinematic. If you have ever wondered why some photos feel warm and emotional while others feel flat, the answer is often timing. This guide walks you through golden hour photography tips, camera choices, shooting habits, and editing thoughts that help you capture that glow without overthinking it. We will talk gear, settings, people, and even those little mistakes that sometimes make a photo better.
Golden hour photography tips often sound mystical, but they are rooted in simple observation. The sun is low, the light travels farther, and everything feels gentler. Once you understand that, things start to click.
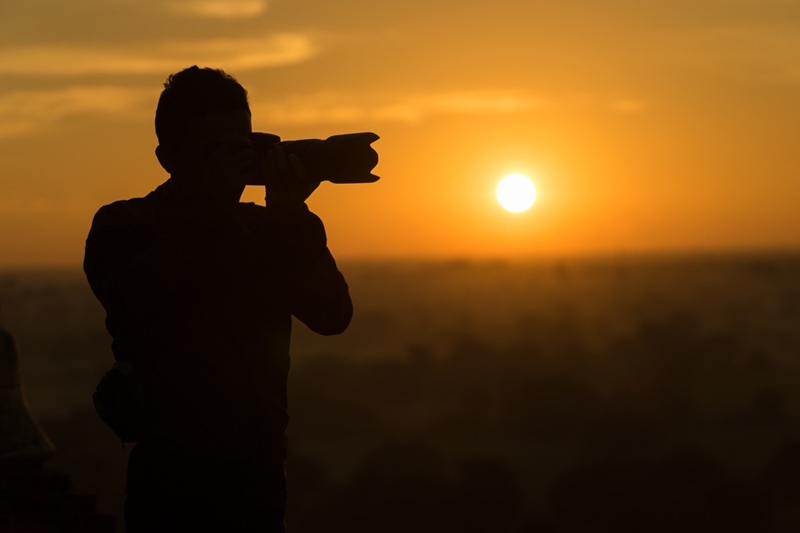
Golden hour is less about the clock and more about the feeling. Yes, it usually happens shortly after sunrise and before sunset. But the real magic is how the light wraps around subjects instead of hitting them straight on. It feels like a warm blanket rather than a spotlight.
You know what? This light forgives a lot. Wrinkles soften. Colors calm down. Even busy backgrounds feel quieter. That is why portraits, landscapes, and lifestyle shots all shine during this window.
You do not need an app obsession. A simple rule works for most of the USA. Start shooting about one hour before sunset, earlier if you want brighter tones, later if you want deeper warmth. Clouds can stretch the mood longer, which is a gift.
Here is the thing. Do not wait for perfect light. Start early and watch how it changes. The transition often gives you your favorite frames.
Once the light is on your side, technique matters, but not in a stiff way. Golden hour shooting techniques should feel flexible, not rigid.
Try moving around your subject instead of moving it. Backlighting creates a soft halo. Side lighting adds texture and depth. Front lighting feels clean and classic.
Shadows during golden hour are longer and kinder. Use them as leading lines or framing tools. A fence shadow across a road or tree shadows stretching across grass can add quiet drama.
Some of the best golden hour shots happen between poses. Hair catching light. Someone is turning their head. A laugh that was not planned.
Honestly, stillness is overrated during this time. Let people walk, spin, or shift weight. The light loves motion.
Don't Miss: Low Light Photography Tips: How to Take Stunning Night Shots
Gear talk can get heavy fast, so let us keep it grounded. The best lens for golden hour photos depends on what you shoot and how you like to move.
Prime lenses like a 50mm or 85mm are favorites for a reason. Wide apertures let in more light and give you that soft background blur people love.
For portraits, a 50mm feels natural and intimate. An 85mm adds compression that flatters faces and backgrounds. Both handle golden light beautifully.
Zooms get unfair criticism. A 24 to 70mm or 70 to 200mm gives flexibility when moments move fast. Kids running. Couples walking. Events you cannot control.
Modern zooms handle low light well, and during golden hour, you often have more light than you think.
Outdoor portrait natural light tips are really about people, not settings. Golden hour helps, but connection does the heavy lifting.
If a pose feels awkward, it will look awkward, even in perfect light. Give simple prompts instead. Walk toward me. Look at each other. Take a breath.
Small movements keep portraits alive. A slight lean. A shift of hands. Light changes quickly, so keep energy flowing.
Golden light warms skin, but watch for too much orange. Turn faces slightly away from the direct sun if the tones feel heavy. Shade can be your friend even during golden hour.
Different skin tones react differently to warm light. Take a test shot. Adjust position. Trust your eyes more than the screen.
Read More: Top 12 Travel Photography Tips to Capture Your Adventure
Sunset photography settings do not need to be complicated. Simple adjustments go a long way.
Start with aperture priority if you want breathing room. Choose a wide aperture like f2.8 or f4 for portraits. Keep ISO low, but do not fear raising it slightly as light fades.
Watch your white balance. Auto works fine, but cloudy or shade can keep the warmth consistent. Check highlights often. The sky burns out faster than you think.
Here is a mild contradiction. Sometimes, underexposing a bit makes sunsets richer. Other times, blowing highlights adds a dreamy feel.
There is no single right answer. Take safe shots, then experiment. Golden hour rewards curiosity.
Metering matters more than people admit during sunset.
Evaluative or matrix metering works most of the time, but switching to spot metering can save you when the sun is still visible.
Editing should support the mood you felt, not replace it. A good golden hour editing workflow respects the light you captured.
Start with exposure and contrast. Then fine-tune warmth. Pull back highlights gently. Lift shadows only if needed.
Avoid heavy filters that crush color. If everything turns orange, step back. Golden hour is warm, not loud.
Lightroom is a staple for many photographers. Presets can help, but treat them as starting points. Adjust for each scene.
Some photographers like Capture One for color control. Others use Photoshop for final touches. The tool matters less than your eye.
Also Read: Event Photography Tips to Capture Every Moment Like a Pro
Golden hour is not a shortcut. It is a collaboration with light. When you show up, stay curious, and let moments breathe, your photos naturally feel warmer and more human. These golden hour photography tips are not rules carved in stone. They are gentle nudges toward better habits and more trust in your instincts. Show up often, and the light will teach you the rest.
Golden hour usually starts about one hour after sunrise and one hour before sunset. The exact timing changes by location and season.
No. Good light matters more than gear. Even entry-level cameras and smartphones perform well during golden hour.
Not always. Aperture priority works great during golden hour, especially when light changes quickly.
Watch white balance and skin tones. Adjust position and edit gently to keep warmth natural.
This content was created by AI