

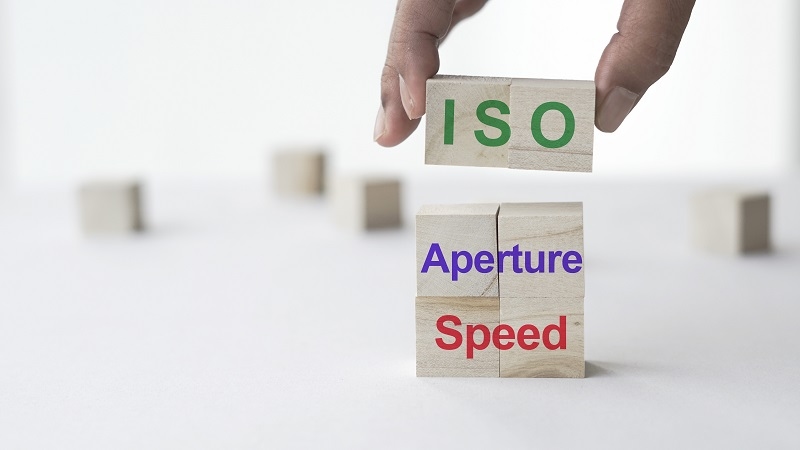
Photography, by definition, is the science and art of light-based image creation. To be able to control whether your photos are going to be light or dark, you must become familiar with the exposure triangle, ISO aperture shutter speed relationship. Having it in your arsenal gives you creative freedom-and not just to avoid under- or overexposure- but to create depth, movement, and noise by design by balancing light in photos.
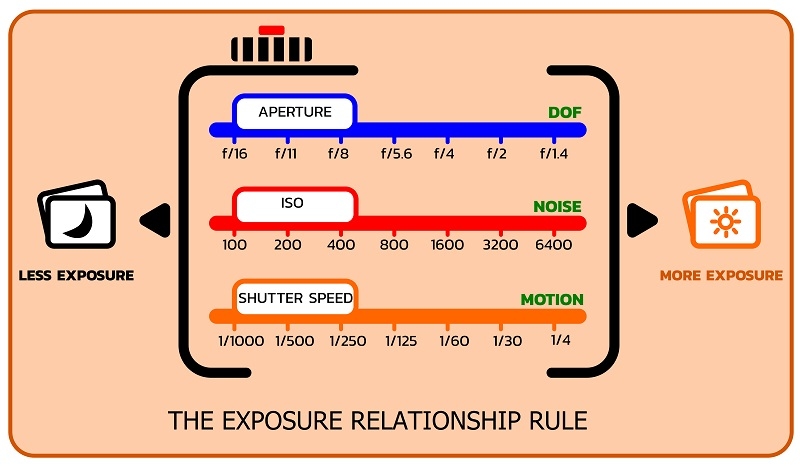
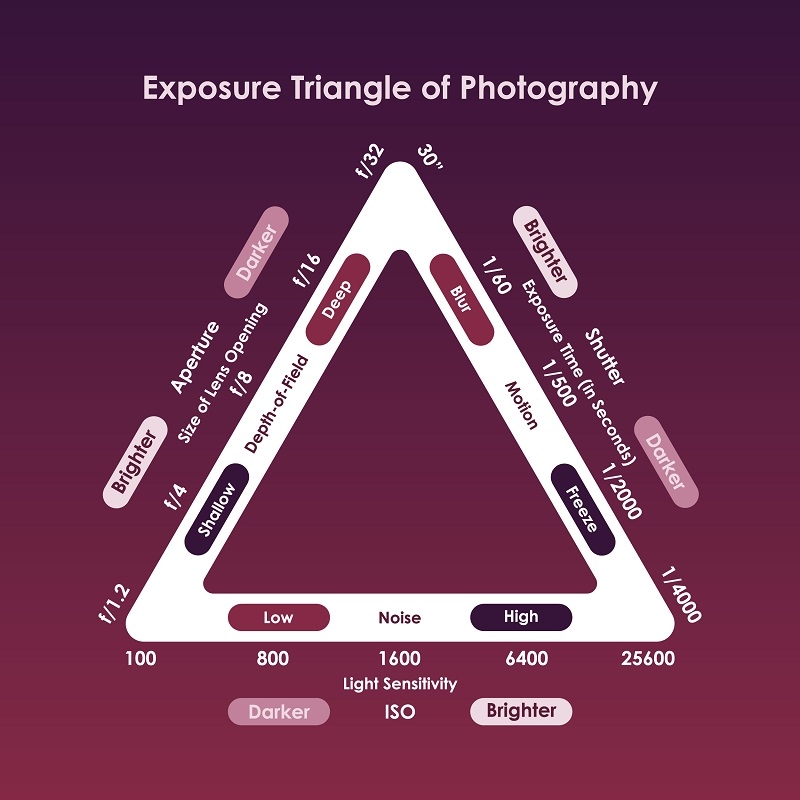
The exposure triangle is the three interdependent settings-aperture, shutter speed, and ISO-used to control how much light hits your camera sensor. The three are intertwined: whenever one of them is changed, one or both of the other two must be changed if you want the same total exposure.
Well, because all points (or sides) impact exposure, and all of them feed into one another. When you open the aperture, you might want to shut off the shutter speed or lower the ISO so you won't overexpose the image. In dim light, raising ISO or lowering shutter speed or opening the aperture are the means you have at your disposal to achieve an exposure which will get the job done.
Picture it as a bucket being filled with water: aperture is how large the pipe is, shutter speed is how long you leave the tap open, and ISO sensitizes the bucket so it can take in more water per drip. You can widen the pipe, keep it open longer or shorter, or sensitize the bucket. The art is knowing which combination of settings maintains balance without compromising the picture.
Let us now take each component of the triangle and examine how the ISO aperture shutter speed relationship operates in practice.
ISO is a value indicating the light sensitivity of the sensor. Smaller ISO values (100–200) provide cleaner photographs with minimal noise; larger ISO values (1600–6400) increase sensitivity but introduce noise or grain.
Every doubling of ISO represents a one-stop increase in exposure, allowing more light in without changing aperture or shutter speed. When you alter one setting, you must alter another to get the same exposure. That is the concept of the ISO aperture shutter speed relationship.
Example:
The chart is a beginning point; change one setting and balance with the other two to achieve proper exposure. The chart visually demonstrates the triangle and allows us to appreciate how variations impact overall brightness and creative control.
Here’s a practical exposure settings chart to help select starting points under common lighting conditions:
| Scene / Lighting | Aperture (f-stop) | Shutter Speed | ISO | Notes / Trade-offs |
| Bright sunlight | f/8–f/11 | 1/250–1/500 | 100 | Ideal for landscapes, full depth of field |
| Cloudy or shaded outdoors | f/5.6–f/8 | 1/125–1/250 | 200 | Balanced start for mid-light situations |
| Indoor with window light | f/2.8–f/5.6 | 1/60–1/125 | 400–800 | May require a tripod or steady hands |
| Dim indoor or events | f/2–f/4 | 1/30–1/125 | 1600–3200 | Watch motion blur and noise |
| Night or very low light | f/1.4–f/2.8 | 1/8–1/60 | 3200+ | Tripod or stabilization recommended |
Automatic settings are handy, but relying on them alone takes away freedom. With manual exposure control, you can balance light in photographs the way you want.
Select the setting that will affect your most significant creative desire: aperture for depth of field, shutter speed for motion, or ISO for noise.
Shooting something backlit may deceive the camera's meter into under-exposing the face. You can:
This exercise shows manual exposure control and how it balances light effectively in photographs.
Even experienced photographers make mistakes sometimes when adjusting the exposure triangle. The following are the most frequent exposure mistakes and how to prevent them:
The exposure triangle is the secret to taking well-exposed, engaging photos. Understanding the ISO aperture shutter speed relationship, referring to an exposure settings table, and having manual exposure control under your belt allow you to balance light in images and avoid common exposure mistakes.
By trial and error, you'll learn how to make snap decisions: which control to adjust first, how to do it, and how to produce the exact look you need. The triangle mastered, you'll move from reacting to being imaginatively, judiciously photographic, photographing each shot with confidence and accuracy as you envision it.
This content was created by AI